Hello from the hill! I’ve been missing in action from the blogging world for a bit. Our DIY parties here on the hill and the Etsy shop picked up tremendous speed during the holiday season. I didn’t know if I was coming or going quite frankly. Things have slowed way down, so now I can finish my big project list, blog and work on some fun DIY projects for ya.
I don’t think my brain really ever shuts down, not even when I go to bed. I honestly dream of projects…now that’s a darn shame. Sometimes I wake up in the morning and think, oh my goodness that’s an awesome idea, then try to draw it out. Other dreams not so much!
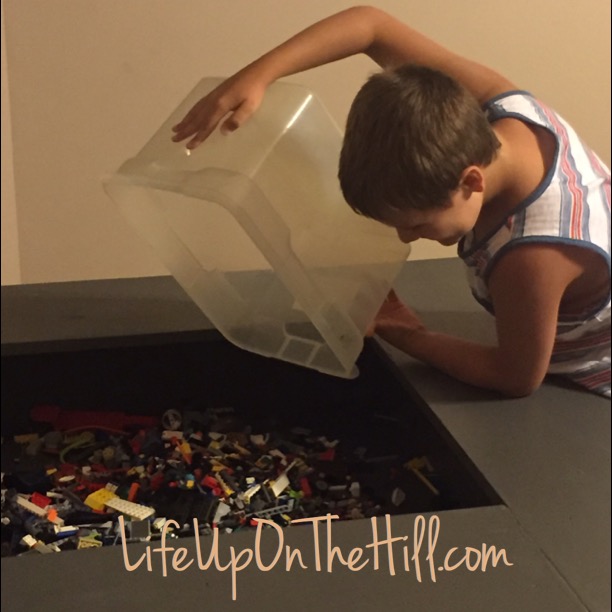
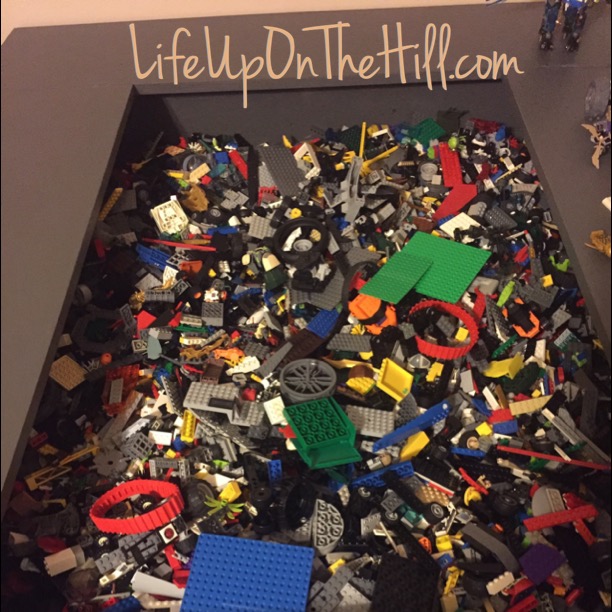
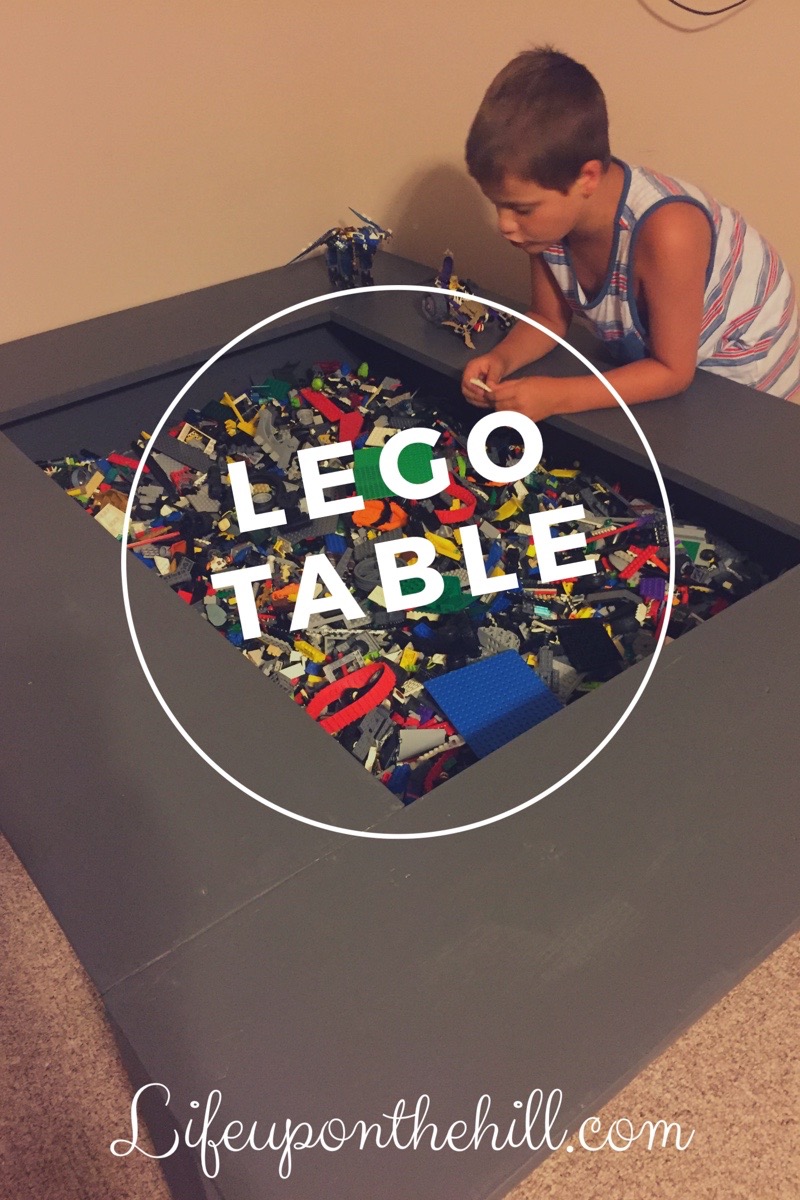
Any who…today I want to talk about building a Lego table. Our 9 year son (lil dude) is all about Legos. When he was around 3 years old we introduced him to the big lego blocks, you know the Duplos? He would tinker with those but quickly lose interest. He had his eye on a much bigger prize…the real Lego bricks. Our older son had several totes that he was hanging on to for nostalgic reasons I suppose, and when lil dude would see the tote in the soldier boys closet, he was mesmerized. He knew those totes contained the real Legos that he wanted to play with. Soldier boy reluctantly gave lil dude one of those totes. He was in heaven. We were unsure at first if we should allow him to play with those smaller pieces, but we watched him closely and he never had the urge to stick them in his mouth. Those Legos were his pride and joy and he would play with those for hours on end. Since that time, his love for Legos has NOT decreased, but rather increased! Literally all he ever asks for at Christmas, Birthday or any other holiday that requires gift giving is Lego sets. Needless to say his room became overrun with Legos. Have you ever stepped on one of those tiny pieces??? There’s not enough foul words in this world to articulate that kind of pain.
After cleaning his room on multiple occasions only for it to return to complete chaos, I knew something had to be done. Something HUGE! Like Donald Trump HUGE! So after hours on Pinterest, and using what materials I had on hand, and a trip to the Lowes, the littlemrs and I started building.
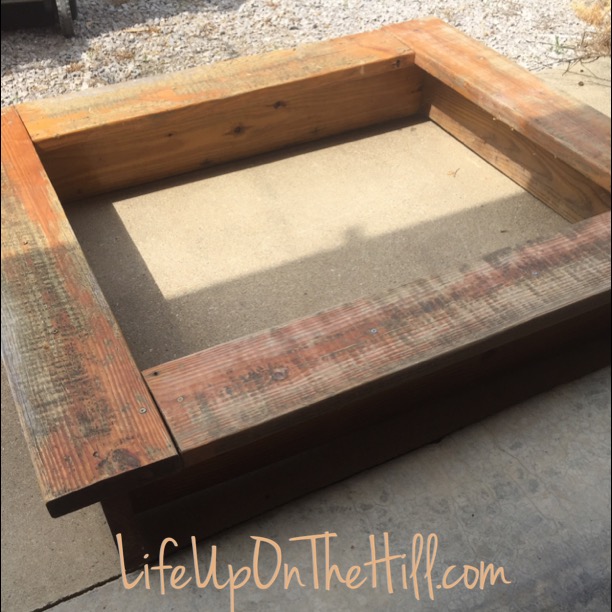
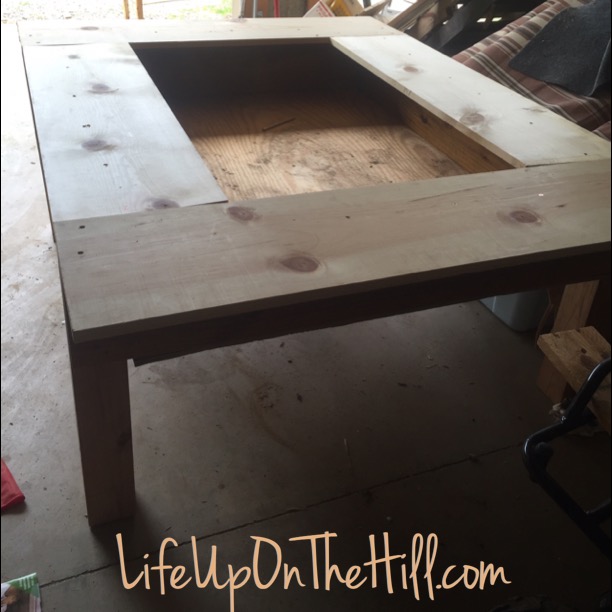
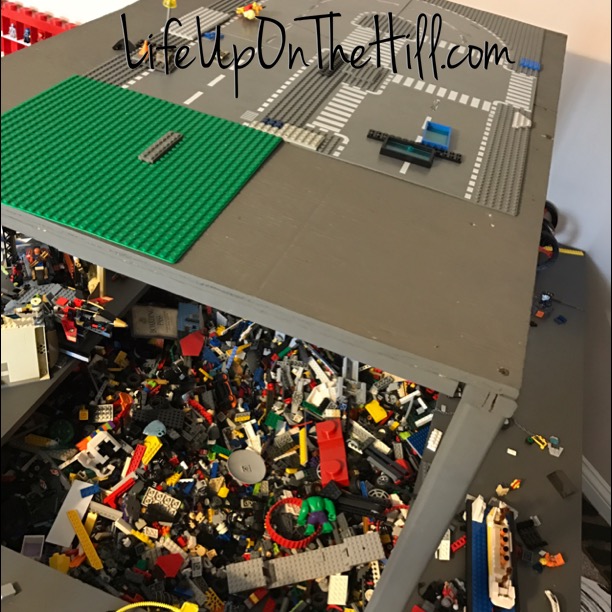
I had found a homemade “sandbox” frame on a mobile garage sale site for $10.00. It was heavy, but the perfect base that I needed for a Lego table. The previous owners of it saw a sand box frame but I saw a Lego table frame. We disassembled the frame and sanded the yellow poly off. Next, we cut it down to the size I needed for the base, then screwed it together. We ripped a piece of 1/4″ plywood to make the bottom portion, then used 1×8’s for the workspace. Once we assembled and sanded it all down, I used clear caulking to seal any gaps so those little Lego pieces wouldn’t go a missing!

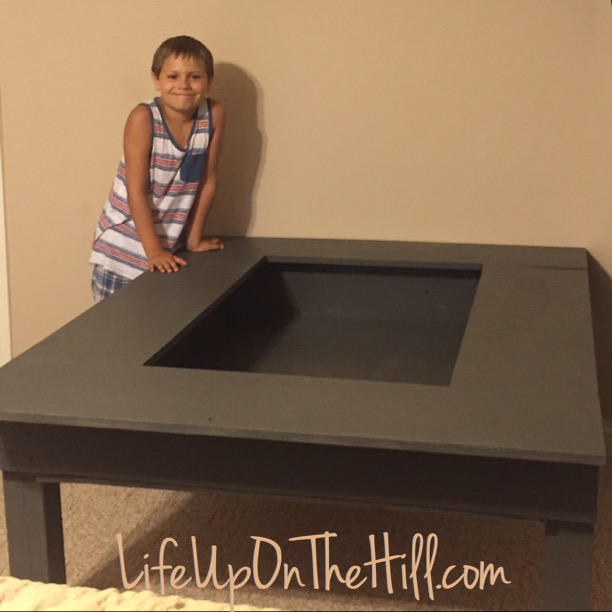
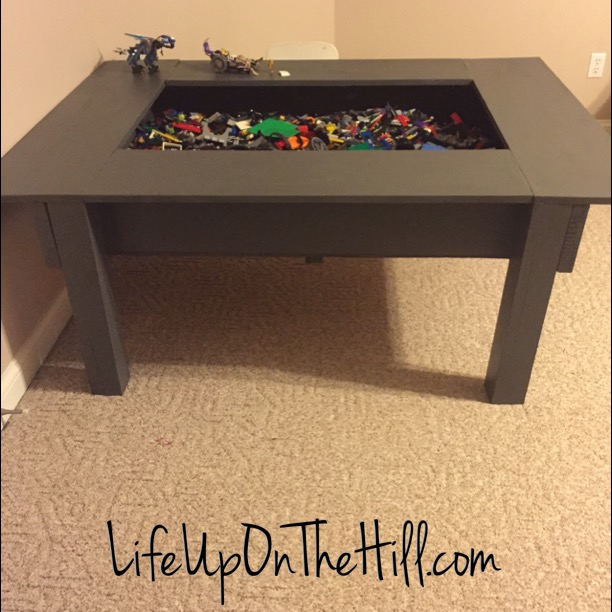
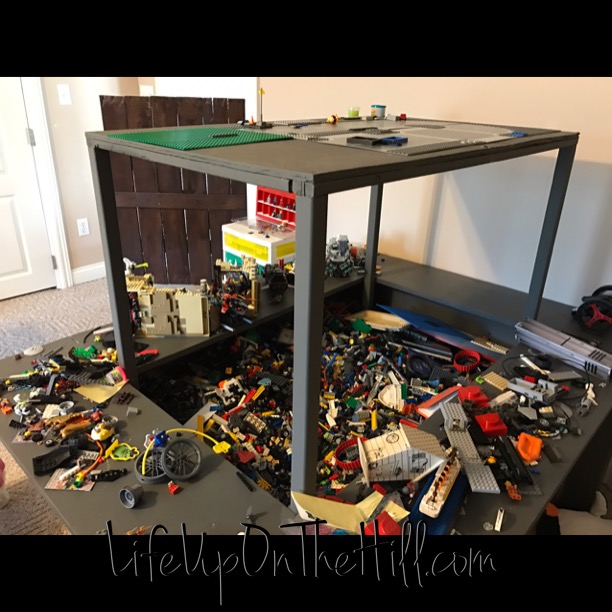
After I had the menfolk move that heavy monster up into lil dude’s room, I made a display area above the “pit”, so he could show-off his creations.

Unfortunately, the frame that I used must have sat in the garage for over a year. I knew it would make the perfect Lego table base, but it took me several months of trying to figure out how to make it happen. I’m not the best woodworker nor would I consider myself to be a professional..lol! I kinda eyeball stuff sometimes, measure then cut, glue it, screw it and call done! It’s how I roll 🙂
To finish this project off, I choose to use paint from lil dudes room (so it would match) and mixed it with Poppies Paint Powder to create a chalk type paint. I then used Daddy Vans clear wax to seal it.
It turned out to be an amazing addition to lil dude’s room! He says he still needs another table to actually build bigger pieces on, but he’s just gonna have to deal with this for a while. I mean it took me over a year to build this, so its going to be a minute before I attempt another one for him. 🙂
Hopefully, you’re inspired to build something great today! Go for it…no fear!

(The Pallet Lady)
DIY for the soul:
“Peace I leave with you, my peace I give unto you: not as the world giveth, give I unto you. Let not your heart be troubled, neither let it be afraid.” John 14:27


Leave a Reply